Welcome

 photo BlogHeader2kwellmandesigns2_zps1vfkip3o.png

Sunday, December 27, 2009

Celebrate 2010 by K. Wellman Designs


This tut was written by me on Dec 27, 2009 and any similarity
to any other is pure coincidence.

This tut was written in PSP X.

Supplies Needed:   Image of choice..I am using the wonderful
artwork of Suzanne Woolcott.  You need a license to use her
work and you can get it HERE

Template by me..you can grab it HERE
Mask 7 by BabesDesignz and you can get it at her blog..HERE
FTU Scrapkit by Lacarolita..You can get it at her blog..HERE

Don't forget to leave these ladies a little love..I know they would
appreicate it..

Let's get started.

1.  Open my template and delete the copyright layer

2.  Using your magic wand, select the gray oval.  Open paper
of choice from kit and copy/paste as new layer above this one.
Go to selections, Invert, hit your delete key, selections, select none.

3.  Repeat for each layer of the template with paper of choice.

4.  Open paper 8 and copy/paste as new layer above the white
background layer.  Open your mask...Right click on paper 8, Choose
new mask layer, from image.  Pick your mask from the drop down list. 
Check source luminance and Invert mask data and hit ok.  Right click
on paper layer and merge group.  Use pick tool and size as needed.

5.  Open glitter and image, resize 550 x 550.  Copy/Paste as new layer
above your mask layer.

6.  On your circle layer, go to adjust, add/remove noise, add noise, check
random and monochrome. 50 and ok.  This just give your layer a little glitter
look.

7.  Add drop shadow to all layers.

8.  Add image of choice and any elements you like from the kit.  You will
need to resize with pick tool to suit yourself.  Give these a dropshadow as
well.

9.  Add copyrights, Wording of choice and your name.  Save as png file.

I hope you have enjoyed my tut..Please feel free to share your results with me.

mschowwv@yahoo.com

Hugs..Kat

Happy New Year by K. Wellman Designs


This tut was written by me on Dec 27, 2009 and any
similarities to any other is pure coinsidence.

This was written in PSP X and although I have tried to
give some detail, it does assume you have knowledge of psp.

Supplies Needed:  Template by me..you can grab it HERE
                             FTU Scrapkit by Lacarolita..you can
                             download it at her blog HERE 
Don't forget to leave her a little love..A thank you is always
appreciated..
                             BabesDesigns Mask 25.. You can grab it HERE

I am using the wonderful artwork of Suzanne Woolcott.  You need
a license to use her work and you can get one HERE

Let's get started...

1.  Open my template and delete the copyright layer

2.  Using your magic wand, select the large gray oval.  Copy and
paste a paper of choice from the kit as a new layer above this one. 
Go to selections, Invert, hit your delete key, then selections, select
none.

3.  Repeat number 2 for the white oval. 

4.  Add a new raster layer and flood fill white.  Move to bottom. If you
prefer a transparent background you may delete this later, but it helps you
see more of what your tag will look like.

5.  Open your mask.   Open paper 3 and copy/paste as new layer and move
above white background layer.  Right click on paper layer, New mask layer,
from image.  Choose your mask from drop down menu..Check source
luminance and invert mask data..hit ok and merge the group.  Use pick tool
and size mask to suit yourself.

6.  Copy and Paste fireworks 2 as a new layer above your mask layer.

7.  Copy and Paste image of choice and place where you choose on tag.

8.  You may add elements according to my tag or ones of your choice..

9.  Give everything a nice drop shadow..I used 3,3, 50 and 5 with black.

10.  Image resize 550 x 550.  Add copyrights and name, save as png..

I hope you have enjoyed my tut.. Please feel free to show off your work..
my email is mschowwv@yahoo.com.

Have a Happy New Year...Hugs..Kat

Friday, December 4, 2009

Christmas Blessings K.WellmanDesigns 2009


This tutorial was written by me on December 3, 2009.  Any resemblance
to any other is pure coincidense.

I hope you enjoy and would love to see your results..

Christmas Blesssings


Supplies Needed: 

Image of choice.. I am using the wonderful artwork of Suzanne Woolcott. 
You need a license to use her art.  You can get one HERE
FTU Scrapkit from Scraps by Yanna Called Merry Christmas 2009.
You can download the kit HERE
My supplies.  You can download HERE

Open New image 500x500 and flood fill with color to match
Where tag will be used.

Open wreath and resize 473x500. Copy/Paste as new layer and close original
without saving the changes.

Image, Canvas size to 700x700 to get room to work.

Open background from supplies and copy/paste new layer. Move below your frame.

Open mask from supplies and copy/paste new layer and move below background.

Open reindeer and image, resize 600x221, image, mirror. Copy/Paste as new layer
and move to bottom of tag on top of all layers.

Open tree from supplies and copy/paste new layer and move to right of tag and below
The reindeer layer.

Open image of choice and copy/paste new layer and move to the left of tag below the
reindeer layers.Give these 3 layer, tree, image and reindeer a drop shadow of choice.

Use my wordart from supplies or do you own and place top right of tag. Give drop shadow.

Add copyright and name.

You may have to use your pick tool to resize some elements to suit your tag.
Do so until you get it the way you want it to look.

You can merge visible, crop your tag and save now or go on to animate.

1. In your layers pallet, hide all layers except your white background, or what ever color
you used. Go to edit, copy merged,

2. Open Animation Shop and go to edit, paste as new animation. Go to edit, duplicate
selected. Do this 2 more times so that you have a total of 5 frames.

3. Back in PSP. Hide background layer and unhide mask & circle background.

Go to edit, copy merged.

4. Back in animation shop. Edit, Paste as new animation. Edit, duplicate selected until you
 have 5 layers of this one.

5. Back in PSP. Hide mask, circle, and background. Unhide all other layers. Edit, copy
merged and back in animation, again edit paste as new animation.

6. Edit, duplicate selected until you have 5 layers.

7. Open my snow from supplies.

You should now have 4 animations all with 5 layers each.

1. Select mask/circle animation and go to edit, select all and then edit, copy.

2. Go to your background and edit, select all and then edit, paste into selected frame.
Hold your mouse key down until it is centered the way you want and then let up on key.

3. Go to my snow. Edit, select all, and then edit, copy

4. Go to the one you just copied the mask/circle onto and edit, paste to selected layer.
Again hold down you mouse key until you have it centered on the circle.

5. Go to your last animation.. Edit select all and edit, copy. Back on tag animation go to edit,
paste into selected layer.

6. Save your animation.

Merry Christmas and May God Bless You Abundantly...Hugs..Kathy

Tuesday, November 10, 2009

Autumn Wordart by K.WellmanDesigns


You can download HERE...Hope you enjoy...Hugs..Kathy

Thursday, November 5, 2009

I'm A Star....K.WellmanDesigns


This tutorial was written by me, K. Wellman on November 5, 2009
and any similarity to another tut is purely coincidental..

I used the wonderful artwork of Suzanne Woolcott and you must
have a license to use her work..You can purchase it HERE

Supplies Needed...
3 Tubes of choice
1 Mask of choice
FTU scrap kit call Rock Baby.  You can download it HERE
Don't forget to leave a little love....

This tut assumes you are familiar with psp.

1. Open new canvas size 550 x 550

2. Open RB ele 67 ( Heart Frame).  Copy/Paste as new layer.  Rt
click and duplicate.  Free rotate to the right a little and move down
and under original.  See my tag.

3. Open papers 4 and 13.  Use magic wand and click inside first frame.
Selections, Modify, Expand by 2.  Copy/Paste one paper as new layer.
Selections, Invert, Hit delete Key, Selections, Select None. Move below
frame.  Repeat for second frame with second paper.

4. Open ele 64, Image, Resize 60%, copy/paste as new layer.  Move to
lower right of tag.  Rt click, duplicate, image mirror, image flip.

5.  Open ele 59 and copy/paste as new layer.  Move to top of tag.

6.  Open first image and copy/paste to tag and move to the left.  copy/paste
your other 2 image as new layers.  Move each one between the frame and
paper.  Size with pick tool and use eraser tool to remove unwanted sections
from outside the frames.

7..Open ele 36 and copy/paste as new layer.  Move to top right.  Rt click,
duplicate, image mirror, image flip, adjust with pick tool to suit yourself.

8.  Copy/Paste any other elements of choice to your tag and give all a
drop shadow.

9.  Copy/Paste paper 4 as new layer and move to bottom of layer.  Apply
mask of choice and merge group.

10.  Add words of choice and copyrights..Save as png..

I hope you have enjoyed my tut..Please feel free to send me your
results to mschowwv@yahoo.com..

Hugs..Kathy

Saturday, October 31, 2009

Variety of frames if anyone can use them..


I've been playing around with a few frames...If anyone can use
them.  You can download them HERE.  You may colorise to
suit your needs.  I do ask that you send others to my blog for
downloads.  I also appreciate a comment.  I like knowing if
my work is being used or if I am wasting my time...Have a great day.
Hugs..Kathy

Friday, October 30, 2009

4 New Cluster Frames, Enjoy....


Click HERE to download.  I would love to hear from you.  Please
leave a comment or you can email your results to mschowwv@yahoo.com.
I hope you enjoy the frames...Hugs..Kathy

Tuesday, October 27, 2009

New Tut for you....


This tutorial was written by K. Wellman on October 27, 2009.
Any resemblance to any other tut is pure coinsidence..

I am using the artwork of Suzanne Woolcott.  You need a license
to use her work..You can get a license HERE

Other supplies needed..
FTU Kit called Nightlife by Bea's Creations.  You can download
the kit at her blog...HERE
Leave a little love..I know she would appreciate it....

Mask 15 by Babes Designs..You can get it HERE

Ok...Let's get started..
This tut was written in PSP X and although I have tried to include
a lot of detail, it does assume you are familiar with PSP..

Open new image 500 x 500.  Open Frame 3, Image Rotate Left, Image
resize 400 x 459.  Copy/Paste as new layer.  Close original.

Use magic wand and click inside frame.  Selections, Modify, Expand 5.
Copy/Paste paper 13 as new layer.  Selections, Invert, Hit your delete key,
Selections None.  Move below frame. Give frame a drop shadow, 3,3, 50
& 3, color black.

Open image of choice.  Copy/Paste as new layer.  Use pick tool to size and
place per my tag..

Open flowers 1 & 2.  Image, Resize 75%.  Flower 1, Image Mirror.  Copy
and Paste both as new layers.  Use pick tool and place to left of tag.  Give
drop shadow.

Open butterfly 5 and Image Resize 40%.  Copy/Paste as new layer.  Use pick
tool and place to right of frame.  Right click and duplicate the butterfly and use
pick tool to arrange.  Give both a drop shadow.

Open wrapbow 3, Image Resize 70%. Copy/Paste as new layer and place at
bottom of frame.  Give shadow.

Open BlingSwirl 13.  Copy/Paste as new layer.  Rt click, arrange and send
to bottom.  Use pick tool to size and move to top of tag so that it show under
your frame.

Rt click, duplicate, Image Mirror, Image Flip.

Open paper 14.  Copy/Paste as new layer and send to bottom.  Open
Mask 15 by Babes Designs.  Image/rotate mask right. 

Right click on paper, New Mask Layer from image.  Choose your
mask.  Check invert mask data and say ok.  Right click on bottom layer and
merge group.

Add wording of choice and credits. Save a png...

I hope you have enjoyed my tut..I would love to see your results..
You can email me at mschowwv@yahoo.com

Love & Prayers..Kathy
to top part of tag.

Monday, October 26, 2009

Tuesday, October 20, 2009

A few frames for anyone who can use them...


Have been playing around with making frames.  Here's a few if
you can use them...Hugs..Kathy

Download HERE

Monday, October 19, 2009

Checking In Tut by K. Wellman Designs


This tut was written my me, Kathy Wellman and is copyright
kwellmandesigns.  Any similarity to another tut is purely coincidental.

Written in PSP X. 

I am using the wonderful artwork of Suzanne Woolcott.  You must have
a license to use her work.  You can purchase a license HERE

Supplies Needed:  FTU Scrapkit Shabby Elegance from simplysensationalscraps.
you can download the kit HERE  Scroll about half way down the page.

Mask number 24 by BabesDesigns.  You can download it HERE

My Frame, you can download it HERE

Lets get started..

1.  Open my frame.  You can go to image, canvas size and resize 700 x 700 to give
yourself room to work, but will need to crop when finished.

2.  Use magic wand and click inside frame.  Open paper 11 and drag/drop as new layer.
Go to selections, invert, hit delete key, selections, select none.

3.   Open paper 23 and click inside frame with magic wand.  Selections, modify,
expand 10.  Drag/Drop as new layer.  Selections, Invert, Hit delete key, selections
none.

4.  Give frame a drop shadow.  I used 3,3,80, 6 & black.

5.  Open lillies 2 drag/drop as new layer.  Image, resize 75%, uncheck resize all
layers, hit ok.

6.  Use pick tool to free rotate and place at bottom right of frame.  Right click, duplicate
image mirror.  Duplicate each of these and rotate and place like mine.

7.  erase a little of the branches at the bottom and open bow 4.  drag/drop as new
layer and using pick tool resize to your liking and place in center.  see mine.

8.  Open image of choice and paste as new layer.  Add any other elements you like.

Give all a drop shadow. 

10.  Open mask.  Open paper 15 and drap/drop as new layer.  Move to bottom.
Right click, new mask layer, from image.  Choose your mask, select invert mask
data and hit ok.   merge group and size with pick tool.  I duplicated mine.

Add wording of choice.  Add credits.  Crop if needed and save as png...

I hoped you have enjoyed my tut..Please leave a comment if you have..Hugs..Kathy

Scallop Frame Freebies


Was learning to make scallop frames and thought I would
share a few with you guys...Enjoy...
You can download them HERE

Saturday, October 17, 2009

Have a Great Day Tutorial by K.WellmanDesigns


This tutorial was written by me on October 18th, 2009 and is 
copyright KWellmanDesigns.  Any resemblance to any other tut is
purely coinsidence. 

Supplies Needed...
Image of choice.  I am using the wonderful artwork of Suzanne Woolcott.
You can purchase a license to use her art HERE
My Cluster frame..You can download HERE at my blog..
Mask number 2 by Babes Designs.  You can download it
from her blog HERE
FTU kit It's Fall by Bel Vidotti.  You can download it HERE
or use any Fall papers & elements of choice.

This tut was written using PSP X.  Let's get started...
1.  Open New image 700 x 700.  Open your cluster frame
     and copy/paste as new layer.
2.  Open paper of choice.  Using magic wand click inside
     frame.  Go to selections, modify, expand, 25
     Drag/Drop the paper as new layer. 
3.  Go to Selections, Invert, Hit your delete key, Selections,
     Select None.  Move below your frame and use pick tool
     to make sure all frame if filled good.
4.  Open image of choice.  Copy/Paste as new layer.  Use pick
     tool and size to your liking.  Right click on image and duplicate.
     move copy below frame.  Use erazer tool and go back to first
     image and erase unwanted portions at bottom.
5.  Add any elements of choice and give all a good drop shadow.  I
     used 2, 2, 80 & 3 color black.
6.  Add words of choice.  Font I used was One Stroke Script 1
7.  Go to image, canvas size 600 x 600
8.  Add new raster layer and move to bottom.  Fill with color of
     choice.  Open your mask.  Right click on layer you just added and
      New mask from image.  Choose your mask..check Invert mask
     data and hit ok.  Merge mask group.  Use pick took to adjust size
     of mask.
9.  Image, resize 500 x 500 and add your credits.
10.  Save as PNG...

I would love to see your work.  You may email me
mschowwv@yahoo.com
I hope you have enjoyed my tut..Please leave me a comment
and let me know..

Cluster Frames..Personal Use Only


Thought I would do a few cluster frames.  Feel free to
download.  HERE
You may use in groups, tags, challenges..ect..but please
leave a link to my blog for download..Hugs..Kathy

Friday, October 2, 2009

Autumn Blessings


Autumn Blessings by K. Wellman 09

I reposted since the last time I didn't get the tag and the tut on the same posting and this time I got it without the white background..Whichever one you follow, the tut is the same...Hugs..Kathy


Thought I would do a nice Autumn tutorial..It is my favorite time of the year. I hope you enjoy it as much as I did..Your finished tag will have a transparent background. .

Hugs..Kathy

This tutorial was written by me, K. Wellman on September 18, 2009 and is ©Kwellman Designs and any resemblance to another tutorial is purely coincidental.

This was written in PSPX. I have tried to put in more detail so inexperienced taggers can follow easily.

Supplies Needed

Image of Choice. I am using a beautiful little girl from Suzanne Woolcotts collection. You need a license to use her work..You can buy a license HERE

FTU Scrapkit from Scraps Dimensions, called Autumn Days.. you can get it HERE

My Leaves, you can get them HERE

If you need the psp file for the leaves..Please download it HERE. I was told by a friend that the

other one wouldn't open in versions lower than 10. So I hope this one will work for you.

My Mask you can get it HERE

Ok, Let’s Get Started
1. Open Round Frame 3 and shift D to duplicate. Close original. Right Click and duplicate 2 times. You now have 3 layers. Use pick tool and make each layer a little smaller inside the original to thicken up your frame. When it looks good, Right Click on layer and Merge Visible. Give Drop shadow 3,3, 50, 5 color Black. Image Resize 500 x 500, Image, Canvas Size 700 x 700

2. Open Paper 1 and Drag/Drop as new layer, move below frame. Open My Mask, Right click on paper layer, New Mask Layer, from image, choose my mask, check source luminance, Hit ok. Merge Group, Image, Resize, 600 x 600, Make sure you uncheck resize all layers, hit ok

3. Click on mask layer, Right click, New Adjustment Layer, Hue/Saturation/Lightness, Move Lightness to 15 Hit Ok

4. Open Paper 1, Using Magic Wand click inside frame layer, Selections, Modify, Expand 10. Drag/Drop paper as new layer. Selections, Invert, Hit delete key, Selections, Select None.

5. Open your image, copy and paste as new layer. Position at left of tag. Give Drop shadow.

6. Open Branch 3, Image resize 20%. Drag/Drop as new layer, use pick tool to position, move below your image, give drop shadow.

7. Open Wheelbarrow2, Image resize 40%. Drag/Drop new layer and move to bottom right corner in front of image on top, add drop shadow.

8. Open leaves 2, Image, Resize, Uncheck lock aspect ratio and size 500 x 170. Drag/Drop as new layer. Use pick tool and move to bottom right corner behind girl and wheelbarrow, add dropshadow. Right click and duplicate, Image, Mirror

9. Open fence, Image Resize 500 x 315, Drag/Drop as new layer. Move to position and size as needed with pick tool, give drop shadow.

10. Place any other elements you want, see my tag for reference. Give all a drop shadow. If you use the bow, Right click and duplicate, move copy below your tree and use eraser tool to bottom parts so your tree looks good.

11. Add Wording of Choice, Copyrights, License. Image canvas size 600x600

12. Image resize 500x500, check lock aspect ratio, check resize all layers, Hit ok.

You can save as png, but go on if you want to add animated leaves.

1. Open my leaves and lock all layers except the bottom layer

2. On your tag, right click and create new raster layer and move below fence layer.

3. Go to frame layer and using magic wand click inside frame, With marching ants moving go back and highlight the new raster layer you created

4. Go back to my leaves, Click on foreground color, Click on pattern, choose my leaves, say ok and flood fill on the raster layer of your tag

5. Go to file, save as and name tag 1 and save as png. It will tell you it has to be merged, say yes.

6. Hit undo to remove the leaves.

7. Go back to my leaves again and lock the bottom layer and unlock copy 1 and highlight it. Choose foreground, pattern, drop down and choose my leaves again. Make sure you do this every time and don’t just leave as current or your animation won’t work.

8. Go back to your tag and flood fill again on the raster layer, file, save as png tag 2 say yes, hit undo.

9. Repeat these same steps until you have tags 1 through 5 saved.

10. Open Animation Shop, Click on animation wizard, Say next, transparent should be checked, say next.

11. Upper left corner of frame checked, With canvas color checked, say next. Yes to repeat, Change display to 20, hit next, Click add image, Select your five tags and have in order 1 through 5, say next, finish. Click view animation icon.

12. File, Save as, Name your animation, Click Save, Click Customise, Click on partial transparency tab, change convert pixels to 25 and blend color to EOE19F to match your mask, ok, next, next, finish.

I hope you have enjoyed my tutorial. As always, I would love to see your work. You can email me at mschowwv@yahoo.com

Thursday, September 24, 2009

Happy Halloween by K. Wellman 09


Happy Halloween by K. Wellman 09
This tutorial was written by me, K. Wellman on September 23, 2009 and is ©Kwellman Designs and any resemblance to another tutorial is purely coincidental.
Written using PSP X assuming you have good knowledge psp
Supplies Needed: Image of choice. I used the gorjuss artwork of Suzanne Woolcott. You need a license to use her work. Visit her Here to obtain a license.
Template Harvest Moon by Sabre. You can download it HERE

FTU Scrapkit Halloween Delight by Sabre. You can download it HERE

Note: This kit doesn’t contain a lot of paper choices, so when filling my template I used patterns & gradients.. or use papers from another kit..
Lets Get Started.
The drop shadow I used was 2,2,50,5 color black. Give each layer a drop shadow as you go along.
1. Open your template and shift D to duplicate then close original

2. Delete the designers name layer

3. Start at the bottom and use your magic wand to select the first layer to fill. Flood fill with color or paper of choice. Once filled go to selections, select none and move to next layer.

4. Sometimes when you have layers like the reeds, dots, ect…Instead of using the magic wand I go to Selections, Select all, Float, Selections Defloat, Flood Fill and then Selections none.

5. Repeat these steps until all layers of template are filled and have drop shadow added.

6. I erased the apple.

7. Open your kit and open each element you want added to your tag. Once opened, you can simply drag and drop onto your tag as a new layer.

8. Use pick tool to resize to suit yourself. Give each element a dropshadow.

9. Open image of choice and copy/paste as new layer. Give dropshadow.

10. Save a psp image with all layers intact.

11. Hide the white background layer

12. Go to edit, copy merged, edit, paste as new image. Hit selection tool to select your tag area and go to edit, copy and edit paste as new image. Delete the first copy.

13. Image, Resize 500 x 319

14. Add your credits

15. Save as PNG file.
I hope you have enjoyed my tutorial. Please leave me a comment and let me know, or email me your finished tag. I would love to see your work. Hugs..Kathy

Tuesday, September 22, 2009

Just Gorjuss Awards Week 10 Grab Bag Challenge

Just Gorjuss Awards Week 8 Animation Challenge


Wonderful Animation from Sue aka Catarific..I can't believe I won.


Just Gorjuss Awards Week 6 Tutorial Challenge

Saturday, September 19, 2009

From my friend Janet, Thank you for a gorjuss tag..

From my friend Christy..Thank you so much..


Any of you Kathy's feel free to snag...Life truly is sweet with gorjuss friends..

Thursday, September 17, 2009

Heart of an Angel..

Thought I would show off a tag made by Christy from one of my tuts...Beautiful tag..Thank you Christy...
Any of you Kathy's out there, feel free to snag...


Tuesday, September 15, 2009

Welcome to our Group by K. Wellman 09

Thought I would take time for another tutorial.  Hope you enjoy it..


Welcome To Our Group by K. Wellman 09


This tutorial was written by me, K. Wellman on September 12, 2009 and is ©Kwellman Designs and any resemblance to another tutorial is purely coincidental.

This was written in PSPX

Supplies you will need:

3 images of choice.  I use the gorjuss artwork of Suzanne Woolcott.  You must have a license to use her work.  You can visit her Here to get a license.

FTU Scrapkit, Sweet Spring from SimplySensationalScraps, you can get it HERE

Template 235 by Missy. You can get her templates HERE

Mask 16 by Babes Designs..Get it Here

Are you ready..Get Set…Lets Go…

1. Open template, Shift D to duplicate and close original. Image Resize 500 x 357

2. Select blue square with your magic wand. Open paper 11, drag and drop onto your tag template as a new layer. Go to selections, Invert and hit the delete key. Then go to Selections, Select None.

3. Give drop shadow, I used 2,2,50 & 5 with color black, Use same dropshadow throughout this tut.

4. Select pink rectangle with magic wand, Open paper 13 and drag/drop as new layer onto your tag. Selections, Invert, Hit Delete Key, Selections None, Give Dropshadow

5. Repeats these same steps on each layer of template with your paper of choice until your template looks the way you want it.

6. Delete the I LOVE YOUR STYLE layer

7. Add wording of choice. I used the font JESTER and used the pick tool to size to my satisfaction. If you want your font outlined, make sure to change your stroke width to 1 or 2, or whatever looks best. You need your foreground color to be lighter than your background for this to look good.

8. Open your 3 images of choice.

9. Copy and Paste image one as a new layer. Using pick tool, move and position above middle frame. Right Click and Duplicate. Move this copy below your frame. Use the eraser tool to delete unwanted parts of the image from both layers.

10. Repeat this step for remaining two images and give all a dropshadow.

11. Open ladybug 5 and resize 50%. Drag/Drop as new layer. Right click on this layer, Arrange, Bring to top. Using pick tool position according to my tag. Tweak size with pick tool if needed and add drop shadow.

12. Open ButtonBow1 and resize 50%. Drag/Drop as new layer. Use pick tool to position and give drop shadow.

13. Open flower 4, resize 50%. Drag/Drop as new layer. Move below all frame layers. Use pick tool to position at left of tag, (see mine) right click and duplicate, Image, Mirror

14. Open Frog and resize 30%, Drag/Drop as new layer and position with pick tool. See my tag.

15. Add New Raster Layer and move above the white background layer. Flood fill with color of choice. Right click on the layer, New Mask Layer, From Image, Use drop down to choose your mask. Source Luminance checked, Invert mask data checked, click ok. Right click on layer and merge group. Use pick tool to size and position mask around your tag.

16. Add credits

17. I save all of my tags as pspimage with all layer intact in case I want to change something later at this point.

18. Delete the white background and right click on any layer and choose merge, merge visible and save as a PNG file.


I hope you have enjoyed my tutorial. I would love to see your work…You can email me at mschowwv@yahoo.com

Thursday, September 10, 2009

The Heart of an Angel by K. Wellman 09

Here's a new tut for you.  I hope you enjoy it and would love to see your work...


The Heart of an Angel by K. Wellman 09


This tutorial was written by me, K. Wellman on September 9, 2009 and is ©Kwellman Designs and any resemblance to another tutorial is purely coincidental.

For this tut you will need the following supplies
1 image of choice. I am using the gorjuss artwork of Suzanne Woolcott. You can not

use her work without a licence. Go to http://www.gorjussart.com/ to purchase a license or use another image.

Mask by kwellmandesigns. You can download it HERE

FTU Scrapkit, Antique Beauty by Monica. You can download it from her blog, HERE

This tutorial was written in PSPX and assumes you have a fairly good understanding of psp, however I will try to be as informative as I can.


Let’s Get Started…We will create the frame first..

1. Open Folder containing your kit papers & elements. Open paper 18, Shift D to duplicate and close original.

2. Go to Selections, Select All, Selections, Modify, Contract 25, Selections, Invert, Edit, Copy, Edit, Paste as new image.

3. Go to Effects, 3D effects, Inner Bevel, Use These Settings…Bevel #6, Smoothness 10, Depth 10, Ambience –25, Shininess 25, Angle 100, Intensity 50, Elevation 50 and Color d5cbd2

4. Image, Resize 300 x 400, Image canvas size 700 x 700, this will give you plenty of room to work. We will crop tag later.

5. Save your work as a pspimage file with all layers intact and save often.

6. Open mask and minimize

7. Open paper 16, Edit copy, then Edit, paste as new layer. (If you keep your layer pallet open you can drag and drop to your tag as new layer)

8. Select this new layer and right click, choose new mask layer, from image, Use dropdown to pick my mask, check source luminance, and uncheck invert mask layer.

9. Merge the group

10. Use pick tool to resize mask so that it show nicely around your frame.

11. Open Paper 8 and copy, paste as new layer. Move between frame and mask layers. Using pick tool resize until it shows nicely behind your frame.

12. Open Image of choice. Copy and Paste as new layer. Position and size with pick tool. (See my Tag). Duplicate and move copy below the frame layer. Use eraser tool to remove her feet from overlapping from of frame.

13. Open ribbon two, Copy & Paste as new layer. Move all the way to bottom then position as lower right of tag. Duplicate ribbon, Go to image, mirror and then image and flip. See my tag or position to your satisfaction.

14. Open Flower Swirl 2, Copy & Paste as new layer. Move to bottom, Duplicate and Mirror.

15. Open Beads 3 and Resize 75%. Copy & Paste as new layer. Place layer above frame and move to the left side of tag. Duplicate & Mirror. See my tag.

16. Open Wrap 6, Resize 75%. Copy & Paste as new layer. Place to left side of tag. You may need to tweak the size with your pick tool.

17. Open butterfly 3 and resize 50%. Paste as new layer and place at upper right corner of frame.

18. Open hanging heart 3 and paste as new layer then place below the butterfly layer.

19. Open Sunflower 3 and resize 50%. Paste as new layer and position as lower left corner of frame. Duplicate 2 times and using pick tool resize and position. See my tag.

20. Add Wording of Choice. The font I used was Storybook.

21. Give all layers except background and mask a nice drop shadow. The settings I used were, 1, 1, 50, 5 and color black.

22. Add your credits/copyrights

23. Go to Edit, Copy Merged, Edit, Paste as new image (We will close this one in a minute without saving)

24. Go to edit and copy again and paste as new image. This will crop it nicely. You can close the other one without saving.

25. Resize 426 x 500 and save a png file.

I hope you enjoyed my tut. I would love to see your completed work. You can email it to me at mschowwv@yahoo.com

Hugs..Kathy

A beautiful tag made by Jersey Rose from my tut...Love it...


Thought I would show off the first tag made from my tut..It's Just Gorjuss...
Any of you Kathy's out there, feel free to snag...Thank you Jersey Rose...

Visit JerseyRoseCreations HERE

Wednesday, September 9, 2009

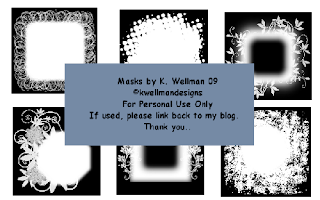
Masks 1-7 k welllman 09

Here is a preview of Masks 1-7
You may download it HERE

Monday, September 7, 2009

Best Friends Tutorial by K. Wellman 09

I did another tut for you to try..Hope you like it..Please leave me a comment and let me know if you use my work..Thank you.

Best Friends by K. Wellman 09
This tutorial was written by me, K. Wellman on September 7, 2009 and is ©Kwellman Designs and any resemblance to another tutorial is purely coincidental.

For this tut you will need the following supplies.

Two images of choice. I am using the artwork of Suzanne Woolcott. You must have a license to use her work…You can visit http://www.gorjussart.com/ to obtain a license.

FTU scrapkit BD Designs for Mariah. You can find it Here.

WSL mask 216 by Chelle. You can download her masks Here.

Template by Ali number 83. You can get it Here.

Lets Get Started..

1. Open template and hit shift D to duplicate. Close the original. Delete DBA layer.

2. Hide all layers except Doodles. Use magic wand to select all of doodle. Open paper 8 from kit and resize 800 x 800. Copy and Paste as new layer. Go to selections, Invert and hit your delete key. Selections None. Merge Visible.

3. Lock Doodle layer and unlock shape 1. Select with magic wand. Go to Selections, Modify, Contract 10. Open Paper 6 and resize 800 x 800, copy and paste as new layer. Selections, Invert and hit delete key. Selections None. Merge Visible. Hide this layer.

4. Unlock center frames and hold shift key and use magic wand to select both frames. Open paper 1, copy and paste as new layer. Selections, Invert, Hit Delete Key, Selections None. Merge Visible.

5. Leave all layers locked except the outer frame layer. Go to Adjust, Hue and Saturation, Hue/Saturation/Lightness, Put check in colorise, Hue 0, Saturation 0, Lightness –100 and hit ok.

6. Open first image. Copy and Paste as new layer. Resize using pick tool and place according to my tag. Right Click and Duplicate, Move below outer frame layer. Use eraser tool to delete unwanted portion at bottom of frame from both copies.

7. Repeat with image two.

8. Open charm 2 and resize 75%. Place in center of tag. Open Bow 1 and resize 75% and place at top of charm. Resize with pick tool if needed and rotate freely if needed.

9. Open flower and resize 75%, copy and paste as new layer and move to bottom left corner of tag.

10. Add wording of choice with font of choice.

11. Give all layers a nice drop shadow. I used 1,1,75 and 5 with color black.

12. Add new raster layer and move to bottom. Flood fill with black.

13. Open your mask of choice and right click on black layer and choose new mask layer, from image. Use drop down to choose your mask. Use source luminance and invert mask data unchecked. Resize to liking.

14. Add License/Copyrights

15. Merge Visible, Resize and Save as PNG file.

I would love to see what you make with my tuts..You may email me at mschowwv@yahoo.com
I thought I would try writing a tut..So here is one for you all to try..It is my first tut and so if I have left off anything, forgive me and maybe the next one will be better.

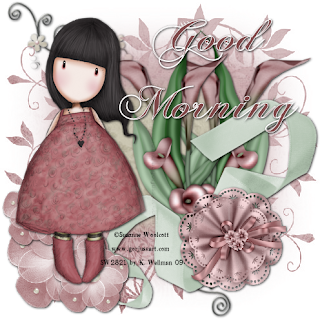
Good Moring by K. Wellman 09


Good Morning by K. Wellman 09


This tutorial was written by me, K. Wellman on September 7, 2009 and is ©Kwellman Designs and any resemblance to another tutorial is purely coincidental.


For this tut you will need the following supplies.


Image of choice. I am using the gorjuss artwork of Suzanne Woolcott.

You must have a license to use her work..


Mask by me available at my blog. http://kwellmandesigns.blogspot.com/search/label/Masks


FTU scrapkit by Monica at http://simplysensationalscraps.blogspot.com/search/label/Kits


1. Open mask and minimize

2. Open new image 500 x 500 and flood fill with white

3. Open paper six, copy and paste as new layer

4. Go to layers, New mask layer, from image. Use drop down option to choose my mask and make sure source luminance is checked, invert mask data unchecked.

5. Merge Group

6. Go to image, canvas size and resize your canvas to 700 x 700 to give yourself room to work.

7. Open flower swirl 2, copy and paste as new layer. Resize and place according to my tag, move under mask layer.

8. Open ribbon 4, copy and paste as new layer, place at bottom right corner of tag.

9. Open sachet 2, go to image, resize and resize 60% making sure all layers is unchecked. Copy and paste as new layer and place on top of ribbon, see my tag.

10. Using magic wand select inside mask, go to selections, modify, expand 50

11. Open paper 15, copy and paste as new layer, go to selections, invert, and hit your delete key, move below mask layer.

12. Open your image and paste as a new layer, place at left of tag

13. Open lilies 2, copy and paste as new layer, resize to suit yourself, duplicate and mirror. Place according to my tag

14. Add your Wording of choice..I used Good Morning with chasecallasSH with stroke width 1.0 and size to liking.

15. Give all layers except mask and white background a drop shadow. I used settings 1,1, 90 and 5 with color black.

16. Add your copyright credits

17. I save mine here as pspimage with all layers intact

18. Delete the white layer, Go to layers, Merge, Merge Visible

19. Click on your pick tool and go to Edit, Copy, and then Edit, Paste as new image.

20. Save this one as png.


I would love to see anything you make with my tut. You can email me at mschowwv@yahoo.com

Wednesday, September 2, 2009

Tuesday, September 1, 2009

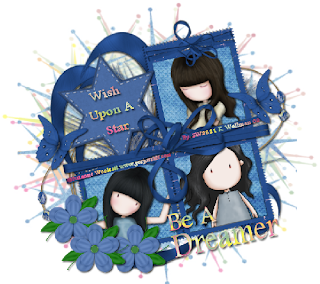
Be A Dreamer


Here's a little snag tag...Click on tag to save full size image...
Please remember, you are welcome to snag, but do not alter..
Thank you and have a great day...

Monday, August 31, 2009

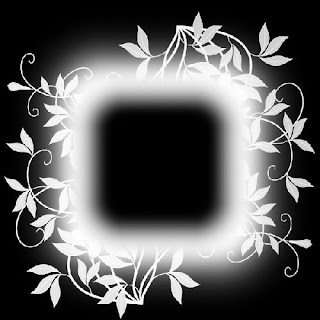
Mask Freebie

I thought I would try my hand at making masks...These is my very first ones and I thought I would share them with anyone that could use them...


Here's your snag for today...May you meet an Angel ...
Click on image to save full size....

Saturday, August 29, 2009

Snag for the day....Everybody Needs a Hug sometimes...
Click on image to save full size...

Friday, August 28, 2009

Enjoy Life, Love Happiness

Another little snag for you...Please do not change or alter..Visit Suzanne's site to buy a license to use her work..


Simply Gorjuss

This is a little tag from the Grab Bag Challenge at J.G.

You are welcome to snag my tags, but please do not alter them in any way...
You must have a license to use the artwork of Suzanne Woolcott...


Tags Made Using My Tuts

Using My 2 Column Layouts...and T.O.U.

Before you install your 2 Column Background Layout First make sure your original installed template is Minima.

To do this, do the following:

At the very top, right hand side of the blog - Click Customize.Click the Layout Tab.Click the Edit Html Tab.In your html file, Look for the type of template you have. It shouldsay something like this..


Blogger Template
Style Name: Minima

If you do not have a Minima template, select a new template style by clicking the Layout Tab and Select New Template Tab.

Changing your template should not delete any of your gadgets or text.


Blog Archive