Welcome

 photo BlogHeader2kwellmandesigns2_zps1vfkip3o.png

Thursday, September 24, 2009

Happy Halloween by K. Wellman 09


Happy Halloween by K. Wellman 09
This tutorial was written by me, K. Wellman on September 23, 2009 and is ©Kwellman Designs and any resemblance to another tutorial is purely coincidental.
Written using PSP X assuming you have good knowledge psp
Supplies Needed: Image of choice. I used the gorjuss artwork of Suzanne Woolcott. You need a license to use her work. Visit her Here to obtain a license.
Template Harvest Moon by Sabre. You can download it HERE

FTU Scrapkit Halloween Delight by Sabre. You can download it HERE

Note: This kit doesn’t contain a lot of paper choices, so when filling my template I used patterns & gradients.. or use papers from another kit..
Lets Get Started.
The drop shadow I used was 2,2,50,5 color black. Give each layer a drop shadow as you go along.
1. Open your template and shift D to duplicate then close original

2. Delete the designers name layer

3. Start at the bottom and use your magic wand to select the first layer to fill. Flood fill with color or paper of choice. Once filled go to selections, select none and move to next layer.

4. Sometimes when you have layers like the reeds, dots, ect…Instead of using the magic wand I go to Selections, Select all, Float, Selections Defloat, Flood Fill and then Selections none.

5. Repeat these steps until all layers of template are filled and have drop shadow added.

6. I erased the apple.

7. Open your kit and open each element you want added to your tag. Once opened, you can simply drag and drop onto your tag as a new layer.

8. Use pick tool to resize to suit yourself. Give each element a dropshadow.

9. Open image of choice and copy/paste as new layer. Give dropshadow.

10. Save a psp image with all layers intact.

11. Hide the white background layer

12. Go to edit, copy merged, edit, paste as new image. Hit selection tool to select your tag area and go to edit, copy and edit paste as new image. Delete the first copy.

13. Image, Resize 500 x 319

14. Add your credits

15. Save as PNG file.
I hope you have enjoyed my tutorial. Please leave me a comment and let me know, or email me your finished tag. I would love to see your work. Hugs..Kathy

Tuesday, September 22, 2009

Just Gorjuss Awards Week 10 Grab Bag Challenge

Just Gorjuss Awards Week 8 Animation Challenge


Wonderful Animation from Sue aka Catarific..I can't believe I won.


Just Gorjuss Awards Week 6 Tutorial Challenge

Saturday, September 19, 2009

From my friend Janet, Thank you for a gorjuss tag..

From my friend Christy..Thank you so much..


Any of you Kathy's feel free to snag...Life truly is sweet with gorjuss friends..

Thursday, September 17, 2009

Heart of an Angel..

Thought I would show off a tag made by Christy from one of my tuts...Beautiful tag..Thank you Christy...
Any of you Kathy's out there, feel free to snag...


Tuesday, September 15, 2009

Welcome to our Group by K. Wellman 09

Thought I would take time for another tutorial.  Hope you enjoy it..


Welcome To Our Group by K. Wellman 09


This tutorial was written by me, K. Wellman on September 12, 2009 and is ©Kwellman Designs and any resemblance to another tutorial is purely coincidental.

This was written in PSPX

Supplies you will need:

3 images of choice.  I use the gorjuss artwork of Suzanne Woolcott.  You must have a license to use her work.  You can visit her Here to get a license.

FTU Scrapkit, Sweet Spring from SimplySensationalScraps, you can get it HERE

Template 235 by Missy. You can get her templates HERE

Mask 16 by Babes Designs..Get it Here

Are you ready..Get Set…Lets Go…

1. Open template, Shift D to duplicate and close original. Image Resize 500 x 357

2. Select blue square with your magic wand. Open paper 11, drag and drop onto your tag template as a new layer. Go to selections, Invert and hit the delete key. Then go to Selections, Select None.

3. Give drop shadow, I used 2,2,50 & 5 with color black, Use same dropshadow throughout this tut.

4. Select pink rectangle with magic wand, Open paper 13 and drag/drop as new layer onto your tag. Selections, Invert, Hit Delete Key, Selections None, Give Dropshadow

5. Repeats these same steps on each layer of template with your paper of choice until your template looks the way you want it.

6. Delete the I LOVE YOUR STYLE layer

7. Add wording of choice. I used the font JESTER and used the pick tool to size to my satisfaction. If you want your font outlined, make sure to change your stroke width to 1 or 2, or whatever looks best. You need your foreground color to be lighter than your background for this to look good.

8. Open your 3 images of choice.

9. Copy and Paste image one as a new layer. Using pick tool, move and position above middle frame. Right Click and Duplicate. Move this copy below your frame. Use the eraser tool to delete unwanted parts of the image from both layers.

10. Repeat this step for remaining two images and give all a dropshadow.

11. Open ladybug 5 and resize 50%. Drag/Drop as new layer. Right click on this layer, Arrange, Bring to top. Using pick tool position according to my tag. Tweak size with pick tool if needed and add drop shadow.

12. Open ButtonBow1 and resize 50%. Drag/Drop as new layer. Use pick tool to position and give drop shadow.

13. Open flower 4, resize 50%. Drag/Drop as new layer. Move below all frame layers. Use pick tool to position at left of tag, (see mine) right click and duplicate, Image, Mirror

14. Open Frog and resize 30%, Drag/Drop as new layer and position with pick tool. See my tag.

15. Add New Raster Layer and move above the white background layer. Flood fill with color of choice. Right click on the layer, New Mask Layer, From Image, Use drop down to choose your mask. Source Luminance checked, Invert mask data checked, click ok. Right click on layer and merge group. Use pick tool to size and position mask around your tag.

16. Add credits

17. I save all of my tags as pspimage with all layer intact in case I want to change something later at this point.

18. Delete the white background and right click on any layer and choose merge, merge visible and save as a PNG file.


I hope you have enjoyed my tutorial. I would love to see your work…You can email me at mschowwv@yahoo.com

Thursday, September 10, 2009

The Heart of an Angel by K. Wellman 09

Here's a new tut for you.  I hope you enjoy it and would love to see your work...


The Heart of an Angel by K. Wellman 09


This tutorial was written by me, K. Wellman on September 9, 2009 and is ©Kwellman Designs and any resemblance to another tutorial is purely coincidental.

For this tut you will need the following supplies
1 image of choice. I am using the gorjuss artwork of Suzanne Woolcott. You can not

use her work without a licence. Go to http://www.gorjussart.com/ to purchase a license or use another image.

Mask by kwellmandesigns. You can download it HERE

FTU Scrapkit, Antique Beauty by Monica. You can download it from her blog, HERE

This tutorial was written in PSPX and assumes you have a fairly good understanding of psp, however I will try to be as informative as I can.


Let’s Get Started…We will create the frame first..

1. Open Folder containing your kit papers & elements. Open paper 18, Shift D to duplicate and close original.

2. Go to Selections, Select All, Selections, Modify, Contract 25, Selections, Invert, Edit, Copy, Edit, Paste as new image.

3. Go to Effects, 3D effects, Inner Bevel, Use These Settings…Bevel #6, Smoothness 10, Depth 10, Ambience –25, Shininess 25, Angle 100, Intensity 50, Elevation 50 and Color d5cbd2

4. Image, Resize 300 x 400, Image canvas size 700 x 700, this will give you plenty of room to work. We will crop tag later.

5. Save your work as a pspimage file with all layers intact and save often.

6. Open mask and minimize

7. Open paper 16, Edit copy, then Edit, paste as new layer. (If you keep your layer pallet open you can drag and drop to your tag as new layer)

8. Select this new layer and right click, choose new mask layer, from image, Use dropdown to pick my mask, check source luminance, and uncheck invert mask layer.

9. Merge the group

10. Use pick tool to resize mask so that it show nicely around your frame.

11. Open Paper 8 and copy, paste as new layer. Move between frame and mask layers. Using pick tool resize until it shows nicely behind your frame.

12. Open Image of choice. Copy and Paste as new layer. Position and size with pick tool. (See my Tag). Duplicate and move copy below the frame layer. Use eraser tool to remove her feet from overlapping from of frame.

13. Open ribbon two, Copy & Paste as new layer. Move all the way to bottom then position as lower right of tag. Duplicate ribbon, Go to image, mirror and then image and flip. See my tag or position to your satisfaction.

14. Open Flower Swirl 2, Copy & Paste as new layer. Move to bottom, Duplicate and Mirror.

15. Open Beads 3 and Resize 75%. Copy & Paste as new layer. Place layer above frame and move to the left side of tag. Duplicate & Mirror. See my tag.

16. Open Wrap 6, Resize 75%. Copy & Paste as new layer. Place to left side of tag. You may need to tweak the size with your pick tool.

17. Open butterfly 3 and resize 50%. Paste as new layer and place at upper right corner of frame.

18. Open hanging heart 3 and paste as new layer then place below the butterfly layer.

19. Open Sunflower 3 and resize 50%. Paste as new layer and position as lower left corner of frame. Duplicate 2 times and using pick tool resize and position. See my tag.

20. Add Wording of Choice. The font I used was Storybook.

21. Give all layers except background and mask a nice drop shadow. The settings I used were, 1, 1, 50, 5 and color black.

22. Add your credits/copyrights

23. Go to Edit, Copy Merged, Edit, Paste as new image (We will close this one in a minute without saving)

24. Go to edit and copy again and paste as new image. This will crop it nicely. You can close the other one without saving.

25. Resize 426 x 500 and save a png file.

I hope you enjoyed my tut. I would love to see your completed work. You can email it to me at mschowwv@yahoo.com

Hugs..Kathy

A beautiful tag made by Jersey Rose from my tut...Love it...


Thought I would show off the first tag made from my tut..It's Just Gorjuss...
Any of you Kathy's out there, feel free to snag...Thank you Jersey Rose...

Visit JerseyRoseCreations HERE

Wednesday, September 9, 2009

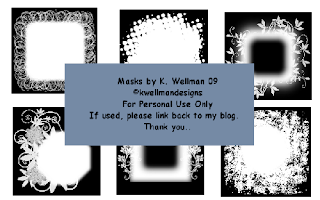
Masks 1-7 k welllman 09

Here is a preview of Masks 1-7
You may download it HERE

Monday, September 7, 2009

Best Friends Tutorial by K. Wellman 09

I did another tut for you to try..Hope you like it..Please leave me a comment and let me know if you use my work..Thank you.

Best Friends by K. Wellman 09
This tutorial was written by me, K. Wellman on September 7, 2009 and is ©Kwellman Designs and any resemblance to another tutorial is purely coincidental.

For this tut you will need the following supplies.

Two images of choice. I am using the artwork of Suzanne Woolcott. You must have a license to use her work…You can visit http://www.gorjussart.com/ to obtain a license.

FTU scrapkit BD Designs for Mariah. You can find it Here.

WSL mask 216 by Chelle. You can download her masks Here.

Template by Ali number 83. You can get it Here.

Lets Get Started..

1. Open template and hit shift D to duplicate. Close the original. Delete DBA layer.

2. Hide all layers except Doodles. Use magic wand to select all of doodle. Open paper 8 from kit and resize 800 x 800. Copy and Paste as new layer. Go to selections, Invert and hit your delete key. Selections None. Merge Visible.

3. Lock Doodle layer and unlock shape 1. Select with magic wand. Go to Selections, Modify, Contract 10. Open Paper 6 and resize 800 x 800, copy and paste as new layer. Selections, Invert and hit delete key. Selections None. Merge Visible. Hide this layer.

4. Unlock center frames and hold shift key and use magic wand to select both frames. Open paper 1, copy and paste as new layer. Selections, Invert, Hit Delete Key, Selections None. Merge Visible.

5. Leave all layers locked except the outer frame layer. Go to Adjust, Hue and Saturation, Hue/Saturation/Lightness, Put check in colorise, Hue 0, Saturation 0, Lightness –100 and hit ok.

6. Open first image. Copy and Paste as new layer. Resize using pick tool and place according to my tag. Right Click and Duplicate, Move below outer frame layer. Use eraser tool to delete unwanted portion at bottom of frame from both copies.

7. Repeat with image two.

8. Open charm 2 and resize 75%. Place in center of tag. Open Bow 1 and resize 75% and place at top of charm. Resize with pick tool if needed and rotate freely if needed.

9. Open flower and resize 75%, copy and paste as new layer and move to bottom left corner of tag.

10. Add wording of choice with font of choice.

11. Give all layers a nice drop shadow. I used 1,1,75 and 5 with color black.

12. Add new raster layer and move to bottom. Flood fill with black.

13. Open your mask of choice and right click on black layer and choose new mask layer, from image. Use drop down to choose your mask. Use source luminance and invert mask data unchecked. Resize to liking.

14. Add License/Copyrights

15. Merge Visible, Resize and Save as PNG file.

I would love to see what you make with my tuts..You may email me at mschowwv@yahoo.com
I thought I would try writing a tut..So here is one for you all to try..It is my first tut and so if I have left off anything, forgive me and maybe the next one will be better.

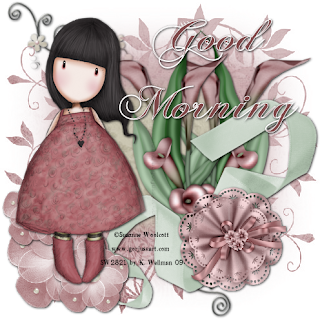
Good Moring by K. Wellman 09


Good Morning by K. Wellman 09


This tutorial was written by me, K. Wellman on September 7, 2009 and is ©Kwellman Designs and any resemblance to another tutorial is purely coincidental.


For this tut you will need the following supplies.


Image of choice. I am using the gorjuss artwork of Suzanne Woolcott.

You must have a license to use her work..


Mask by me available at my blog. http://kwellmandesigns.blogspot.com/search/label/Masks


FTU scrapkit by Monica at http://simplysensationalscraps.blogspot.com/search/label/Kits


1. Open mask and minimize

2. Open new image 500 x 500 and flood fill with white

3. Open paper six, copy and paste as new layer

4. Go to layers, New mask layer, from image. Use drop down option to choose my mask and make sure source luminance is checked, invert mask data unchecked.

5. Merge Group

6. Go to image, canvas size and resize your canvas to 700 x 700 to give yourself room to work.

7. Open flower swirl 2, copy and paste as new layer. Resize and place according to my tag, move under mask layer.

8. Open ribbon 4, copy and paste as new layer, place at bottom right corner of tag.

9. Open sachet 2, go to image, resize and resize 60% making sure all layers is unchecked. Copy and paste as new layer and place on top of ribbon, see my tag.

10. Using magic wand select inside mask, go to selections, modify, expand 50

11. Open paper 15, copy and paste as new layer, go to selections, invert, and hit your delete key, move below mask layer.

12. Open your image and paste as a new layer, place at left of tag

13. Open lilies 2, copy and paste as new layer, resize to suit yourself, duplicate and mirror. Place according to my tag

14. Add your Wording of choice..I used Good Morning with chasecallasSH with stroke width 1.0 and size to liking.

15. Give all layers except mask and white background a drop shadow. I used settings 1,1, 90 and 5 with color black.

16. Add your copyright credits

17. I save mine here as pspimage with all layers intact

18. Delete the white layer, Go to layers, Merge, Merge Visible

19. Click on your pick tool and go to Edit, Copy, and then Edit, Paste as new image.

20. Save this one as png.


I would love to see anything you make with my tut. You can email me at mschowwv@yahoo.com

Wednesday, September 2, 2009

Tuesday, September 1, 2009

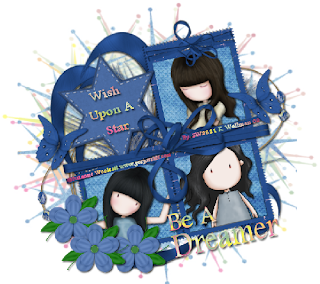
Be A Dreamer


Here's a little snag tag...Click on tag to save full size image...
Please remember, you are welcome to snag, but do not alter..
Thank you and have a great day...

Tags Made Using My Tuts

Using My 2 Column Layouts...and T.O.U.

Before you install your 2 Column Background Layout First make sure your original installed template is Minima.

To do this, do the following:

At the very top, right hand side of the blog - Click Customize.Click the Layout Tab.Click the Edit Html Tab.In your html file, Look for the type of template you have. It shouldsay something like this..


Blogger Template
Style Name: Minima

If you do not have a Minima template, select a new template style by clicking the Layout Tab and Select New Template Tab.

Changing your template should not delete any of your gadgets or text.